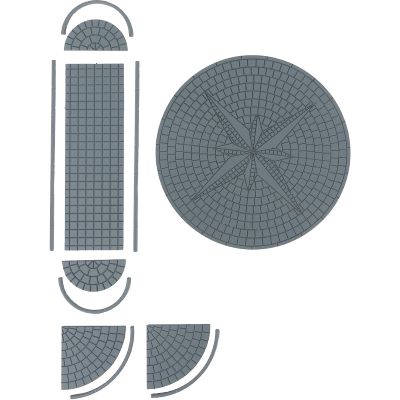
Self-Adhesive Road Film
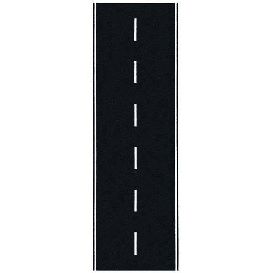
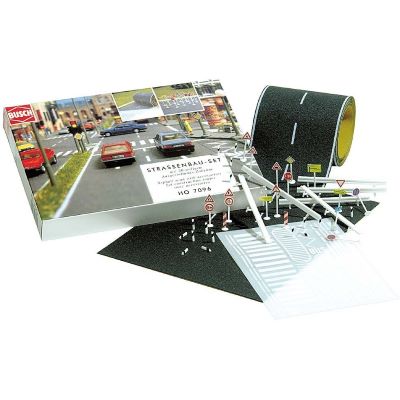
Road film is particularly suitable for long and consistent sections. It is cut to size and applied to a smooth, clean surface. Beginners can quickly create a uniform asphalt or paved surface using this method.

From narrow village roads to asphalt, cobblestones and pavements, through to roadways for moving vehicles: discover how to plan, build, mark, weather and integrate realistic model roads naturally into your railway scenery.
Alongside the railway tracks, roads are among the most important visual lines on a model railway layout. They connect stations, residential buildings, industry, farms, commercial areas and the surrounding landscape. A well-planned road therefore explains almost automatically how the miniature world is organised. A poorly placed or excessively wide road, on the other hand, can make even high-quality buildings and vehicles look visually unsettled.
Building roads on a model railway involves much more than simply applying a grey surface. Roads have different surfaces, widths, verges, pavements, gutters, manhole covers, markings, traffic signs and signs of everyday use. An old village road may be narrow and irregular. A modern main road requires a cleaner alignment. An industrial yard looks more convincing with concrete slabs, patched asphalt and dirty edges than with a perfectly black roadway.
Before construction begins, define the era, region and purpose of the road. Road vehicles, buildings and level crossings should also match the chosen period. Older layouts in particular benefit from roads that are not designed too modern: lane markings, traffic islands, pavements, road signs and road surfaces have changed considerably over the decades.
The simplest method is to use self-adhesive road film or ready-made textured road surfaces. Filling compound, texture powder and special road-building texture paints provide considerably more freedom. These materials allow curves, junctions, squares, parking areas and repaired sections to be adapted precisely to the existing landscape. If a FALLER Car System or Viessmann CarMotion will be used later, the vehicle guidance system must be included in the very first planning stage.
There is no single correct method. The best choice depends on the road alignment, desired surface texture, model scale, era and whether the vehicles will simply be displayed or actually move.
Road film is particularly suitable for long and consistent sections. It is cut to size and applied to a smooth, clean surface. Beginners can quickly create a uniform asphalt or paved surface using this method.
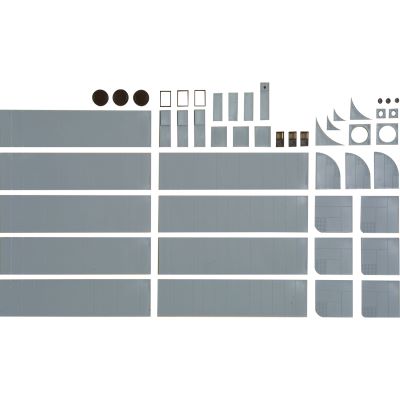
Textured materials already include a visible surface structure. Cobblestones, pavement slabs, concrete and asphalt can therefore be represented without time-consuming modelling and can still be weathered afterwards.
Complete scratch-building is particularly flexible for individual curves, junctions, irregular squares and unusual property entrances. Once the surface is smooth, base colour, texture, markings and weathering can be added.
For moving road traffic, guide wire, magnetic tape, junction mechanisms, sensors and any required stopping points are installed and tested before the final road surface is completed.
Real asphalt quickly becomes lighter and less uniform through sunlight, tyre wear, dust and repairs. Medium to dark grey base colours with very restrained lighter and darker variations usually look much more convincing on a model railway than a uniformly black surface.
Avoid running every road parallel to the edge of the layout. Gentle curves, sections partly hidden behind buildings or trees and changes in elevation create considerably more visual depth.
An old minor road can include repaired patches, cracks and irregular edges. A modern main road looks more believable with cleaner edges and clearly visible markings.
Paved surfaces look particularly convincing when the joints are not equally dark everywhere. Pavements should not simply stop beside the road either: driveways, lowered kerbs, steps, walls and property gates create a logical connection with surrounding buildings.
Drains, manhole covers, street lamps, traffic signs, hydrants, guardrails, bus stops and parked vehicles turn a plain surface into a recognisable road scene.
Work from the large structural elements towards the fine details. Roadways intended for moving vehicles should be tested completely before markings, pavements and scenery are permanently installed.
First mark the road, junctions, driveways, level crossings and squares on the layout base. Temporarily position buildings and the longest road vehicles you plan to use. This quickly reveals whether curves, junctions and clearances look natural.
The roadway should look appropriate for the model scale while still providing enough room for vehicles. On small layouts, a deliberately compressed road may look better than a mathematically exact but visually oversized traffic area.
Uneven areas are particularly visible underneath thin road film. Sand and fill the base carefully. For functional roads, install guide wire, magnetic tape and technical components at this stage.
Apply road film without wrinkles or spread filler, texture powder or road construction texture paint in a thin and even layer. Transitions between individual sections should not remain visible as obvious cut edges.
Urban roads gain considerable depth from gutters, kerbs and pavement slabs. Plan driveways, bus stops and pedestrian areas now so these details do not look as though they were added afterwards.
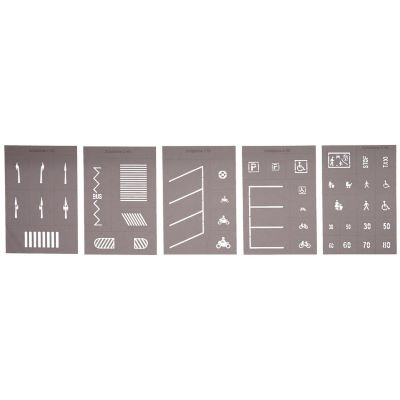
Centre lines, stop lines, pedestrian crossings and parking markings should only be applied once the road surface is completely dry. Use stencils with a small amount of paint to keep the edges sharp and prevent paint from bleeding underneath.
Work with diluted colours, pigments or a nearly dry brush. Wheel tracks can be slightly darker while road edges can be dustier. Repairs and cracks look more convincing when used selectively rather than across the entire surface.
Add verges, grass, bushes, walls, fences and slopes at the end. These elements help hide hard transitions between the road and surrounding scenery. A well-integrated road edge often contributes more realism than adding even more accessories to the roadway itself.
Roads do not belong to a particular track gauge, but they must match the scale of the surrounding vehicles, figures and buildings. Universal texture paints and scratch-building materials make realistic roads possible even in scales with fewer ready-made road plates.
| Gauge / Scale | Suitable Road Construction Method | Key Consideration |
|---|---|---|
| H0 · 1:87 | Road film, plates, paving, texture paint, scratch-building and Car Systems | Very wide selection of roads, pavements, markings and accessories |
| TT · 1:120 | TT and H0/TT accessories, road films, texture paint and scratch-building | Compact road areas suit space-saving layouts particularly well |
| N · 1:160 | Road films, paving, markings and fine scratch-building | Even longer roads through towns require comparatively little layout space |
| Z · 1:220 | Primarily scratch-building and scale-independent texture materials | Fine textures and restrained detailing are especially important |
| H0e / H0m · 1:87 | H0-scale road accessories, texture paints and custom roads | Ideal for narrow country roads, mountain villages and level crossings |
| 0 · approx. 1:45 | Scratch-built roads, texture paste, paint and individually built details | Larger surfaces require particularly convincing textures |
| 1 · 1:32 | Scratch-building with texture paint, filler and detailed road edges | Road wear and joints are much more visible |
| G · approx. 1:22.5 | Robust scratch-built surfaces and suitable universal scenery materials | For outdoor layouts, the base and materials must suit the installation site |
The model scale and desired appearance of the road are more important than the railway track gauge itself. Universal products such as road construction texture paints can be used for many scales.
A road for moving model vehicles must work both visually and technically. Plan the route, curves, stopping points, junctions, intersections and sensor positions before beginning the scenery. Then test the route using the longest vehicles you intend to operate.
The FALLER Car System range includes Laser-Street road elements, guide wire, junction mechanisms, sensors, parking sections and vehicles. FALLER points out that longer vehicles require more steering clearance in curves and that test runs before final scenery construction are particularly important.
Viessmann CarMotion also uses a defined guided roadway and includes magnetic tape, points, accessories and functional vehicles. Regardless of which system is selected, the basic rule is the same: establish reliable technical operation first, then fill, sand, paint and detail the visible roadway.
| FALLER Planning Value | H0 | N |
|---|---|---|
| Roadway width per lane, straight | 50 mm | 30 mm |
| Roadway width per lane, curve | 70 mm | 45 mm |
FALLER also specifies a minimum curve radius of 150 mm and recommends that gradients should not exceed 12 %. Vehicle length, body design and the individual route may require larger radii or wider roadways.
Lay out the route provisionally first and test vehicles in both directions.
Buses and trucks require considerably more space than short passenger cars.
Steps and hard surface irregularities can affect driving behaviour more strongly than on a purely static road.
Permanently install pavements, guardrails, figures and traffic signs only after reliable test operation has been achieved.
A finished road consists of considerably more than the roadway surface. For a believable transition into the railway landscape, the base, surface, pavements, details and, where applicable, vehicle technology all need to work together.
Asphalt, country roads, cobblestones, squares, curves, parking areas and accessories.
Connect road and railway with crossings, barriers and suitable scenery details.
Textured surfaces for road edges, retaining walls, yards and urban scenes.
Create base colours, weathering, repaired areas, joints and subtle colour transitions.
Level roadway bases, shape custom roads and close transitions.
Permanently fix road materials, pavements, signs and scenery components.
Create logical boundaries between properties, industrial areas and roadsides.
Add details for squares, pavements, traffic scenes and the surrounding road environment.
Roadways, vehicles, guidance, sensors and technology for moving road traffic.
Magnetic tape, roadway technology, accessories and vehicles for modern traffic scenes.
Connect roads naturally to hillsides, cuttings and different terrain levels.
Structure hillside roads, station areas and compact urban layouts vertically.
Select a manufacturer logo to open the corresponding English brand world at Modellbahnshop.







The following finder loads products directly from the current Streets, FALLER Car System and Viessmann CarMotion categories. Filter by search term, category, manufacturer, gauge or product type. The product cards deliberately do not display stock or delivery status.
The complete Streets category includes asphalt roads, cobblestones, parking areas, pavements, junctions, markings, traffic signs, guardrails and many additional materials.
Wide traffic areas can quickly consume a large part of the layout. Use model vehicles to check the width that is visually necessary rather than designing every road like a modern arterial route.
Use several shades of grey. Even small variations between the driving area, road edge and repaired sections create considerably more visual depth.
A road should appear to continue logically behind a building, hill, group of trees or beyond the edge of the layout. A sudden ending in the middle of the landscape rarely looks convincing.
Not every metre needs signs, roadworks, vehicles and figures. Quieter sections make important scenes stand out more clearly and create a more natural overall appearance.
Retrofitting guide wire, magnetic tape, junction mechanisms and sensors beneath a finished town causes unnecessary rebuilding. The technical route should therefore be included during the basic construction stage.
Verges, soil, grass, paving or pavements should disguise the transition between the road and terrain. This edge area often determines whether a model road looks naturally integrated or simply glued onto the layout.
The most important decisions concern materials, road width, surface design, model scale, markings and the planning of moving road vehicles.
First plan the alignment and width, then level the base and create the roadway using road film, textured road surfaces, filler or road construction texture paint. Add pavements, markings, road furniture, weathering and finally blend the road edges into the surrounding landscape.
Matt medium and dark grey shades usually look more natural than pure black. For additional depth, wheel tracks, repaired areas and road edges can be coloured with very subtle variations.
There is no single width that is correct for every static road. Village roads, residential roads and main roads are very different. Position model vehicles on the planned road and select a width that suits the prototype and the available layout area. Functional roads must additionally follow the requirements of the selected vehicle system.
FALLER specifies planning values per lane of 50 mm in H0 and 30 mm in N on straight sections. In curves, the values are 70 mm in H0 and 45 mm in N. Long vehicles may require additional space, making practical test runs particularly important.
Road film is quick to install and works well for consistent road sections. Scratch-building with filler and texture paint gives you considerably more freedom for custom curves, junctions, squares, repaired areas and varying road widths.
Texture paints, fine texture powder or a gently textured filler surface work well. Fine grain is important: particles that are too coarse can quickly look like railway ballast rather than asphalt.
Apply markings only after the roadway is completely finished and dry. Stencils are useful for arrows, pedestrian crossings and parking symbols. A small amount of paint and controlled application help prevent blurred edges.
Use subtle colour variations, faded road edges, repaired patches, isolated cracks and a small amount of dust. A few deliberately placed signs of wear usually look more realistic than heavy weathering across the entire surface.
Plan it when the railway and road routes are first defined. Road height, rail profile, crossing components, barriers and any moving road vehicles must be considered together. Alterations at a later stage can be particularly time-consuming.
Roads can be built in virtually every model railway scale. The widest selection is available in H0, TT and N. In Z, H0e, H0m, Gauge 0, Gauge 1 and G, universal texture paints, filling compounds and scratch-building materials allow individual road surfaces to be created.
Always test using the longest vehicles you intend to operate. Buses, articulated trucks and long lorries swing considerably farther out in tight curves than passenger cars. Junctions and driveways should therefore not be dimensioned using short vehicles alone.
Design the road-edge area deliberately. Verges, grass, bushes, pavements, retaining walls, fences, drainage and property entrances help the road merge into its surroundings. Hard, visibly exposed material edges should be avoided.
Discover further guides covering layout planning, track, scenery, buildings, electrics, digital technology, gauges and vehicles in the main Modellbahnshop guide.