
Deciduous Forest
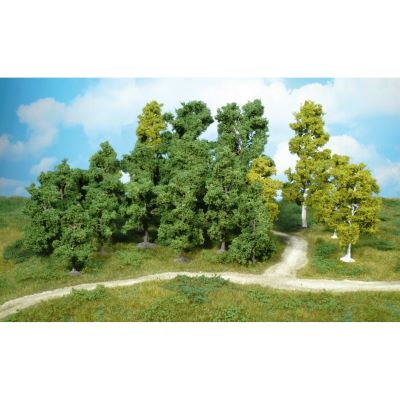
Beeches, birches, oaks, chestnuts and other deciduous trees suit many Central European landscapes. Different crown widths and tree heights prevent the scene from looking like a uniform park.


From a light forest edge and deciduous or coniferous woodland to a dense mixed forest: different tree heights, forest floor, bushes and clearings create natural depth around railway lines, mountains and the surrounding scenery.
Designing forests on a model railway means much more than filling an open area with identical trees. A believable forest contains different tree heights, varying distances, clearings, undergrowth and visible forest floor. This layering is what turns individual model trees into a convincing continuous woodland.
First decide which type of landscape you want to represent. A dense spruce forest in a mountain region needs different tree shapes from a summer deciduous forest, an open birch grove or a mixed forest beside a branch line. Modellbahnshop currently offers deciduous trees , coniferous trees , bushes and shrubs and further plants for transitional areas.
The forest edge is particularly important. In nature, woodland rarely begins immediately with a solid line of tall trunks. Grass, bushes, young trees and smaller shrubs form a layered transition. This can also be used to guide the viewer's eye: low vegetation in the foreground and taller trees farther back increase the impression of depth.
The area underneath the trees also needs attention. With forest floor material, flock, earth and foliage , bright base surfaces and visible tree bases disappear. Small branches, leaves, stones and occasional bare patches turn a simple green area into a convincing forest floor between the trunks.
Beeches, birches, oaks, chestnuts and other deciduous trees suit many Central European landscapes. Different crown widths and tree heights prevent the scene from looking like a uniform park.
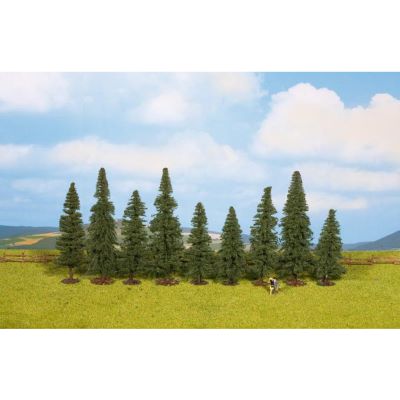
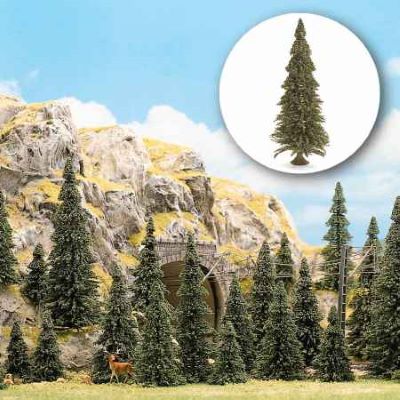
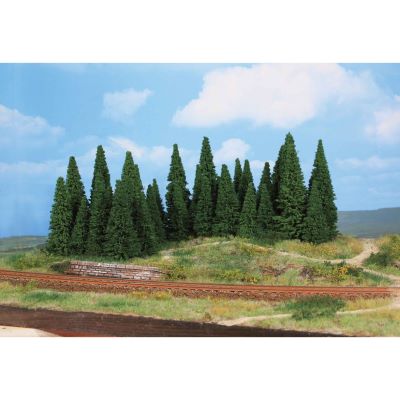
Spruces, firs, pines and larches are particularly suitable for mountain regions, uplands and larger commercial forests. Small differences in height break up an otherwise very regular silhouette.
Deciduous and coniferous trees create a varied scene together. Group similar species in small areas instead of alternating every individual tree in a strict pattern.
Bushes, smaller trees, wild grass and open patches create a soft transition to meadows, railway lines and fields. Tall trees begin slightly farther inside the forest.
The strongest effect comes from layering. Use highly detailed individual trees and bushes along the visible forest edge. Farther inside, tree sets can be placed more densely because the viewer mainly perceives the crowns and trunks as one continuous mass.
Different heights are essential. Even tree sets that deliberately contain several sizes create a more natural silhouette than identical trees positioned at identical intervals. Tall specimen trees can form focal points, while smaller young trees fill gaps.
Do not hide the railway completely. Small viewing gaps between groups of trees allow trains to appear briefly and disappear again. On branch lines and mountain railways this can make the route appear much longer than the available layout space actually allows.
Clearly visible crowns and trunks determine the quality of the forest edge.
Arrange similar trees in loose groups rather than in a regular grid.
Smaller trees can create additional perspective and apparent distance.
Forest floor, animals and paths need deliberately open areas between groups of trees.
Forest floor material, flock and bushes fill the visible spaces between trunks and visually connect individual model trees into one coherent landscape.
Dark brown, grey and olive tones prevent bright patches from appearing between spreading material and tree trunks. Even the painted base should vary slightly in colour.
Fine spreading material represents humus, leaves and dry plant debris. Several shades of brown give the ground considerably more depth.
Bushes, foliage, grass tufts and small young trees belong especially around forest edges, clearings and less heavily shaded areas.
Small branches, roots and individual dead trees create strong natural details. A few carefully placed elements are usually enough.
A narrow forestry or hiking path breaks up larger woodland areas and provides a logical connection to a clearing or forest edge.
Do not bring vegetation directly up to the track. Drainage, embankments and the necessary clearance beside the railway should remain visible.
Deliberately alternate between dense woodland, clearings, young growth and exposed forest floor. This makes the forest more interesting and also allows it to connect naturally with track, paths, rocks and the layout background.
Mark the forest edge, clearings, paths and viewing gaps on the terrain first.
Keep maintenance areas and hidden track accessible.
Brown, grey and olive form the base for humus, leaves and undergrowth.
Completely cover white or bright unfinished surfaces.
Mix forest floor material, flock and fine natural materials irregularly across the surface.
Make clearings slightly lighter than densely shaded woodland.
Position the larger trees loosely first and check the silhouette from the normal viewing angle.
Avoid identical spacing and straight rows.
Place smaller trees and tree sets between the main trees and build loose groups.
Deliberately preserve a few open areas.
Place bushes, grass and young trees in front of the taller woodland.
Do not create a closed vertical wall of identical trees.
Add foliage, shrubs, branches and selected grasses between visible trunks.
Use less undergrowth in heavily shaded areas.
Place forest animals, hikers or small forestry scenes sparingly on clearings and along forest edges.
Large quiet forest areas should retain their visual impact.
Light green tones, fresh bushes and lighter foliage create a young and fresh woodland appearance.
Several medium and dark green shades create a dense, fully foliated forest.
Mix yellow, ochre, reddish brown and green. Do not colour every deciduous tree identically.
Deciduous trees become bare while conifers remain important green structural elements in the forest.
Deer, stags, wild boars, foxes and other animal figures can bring woodland scenes to life. They look especially convincing on clearings, forest edges and paths where they remain visible from the normal viewing position.
Do not distribute animals evenly between every tree. A small group at the edge of the forest tells a stronger story than many figures hidden inside dense woodland. Hunters, hikers or a raised hunting stand can also complement the scene when they suit the chosen layout theme.
| Gauge | Scale | Suitable Forest Structure | Pay Particular Attention To |
|---|---|---|---|
| Z | 1:220 | Small trees and fine forest floor | Choose very fine crowns and undergrowth |
| N / Nm | 1:160 | Large woodland areas and extensive slopes | Use tree groups rather than too many individual focal points |
| TT | 1:120 | Mixed and coniferous forests with good visual depth | Combine several tree heights |
| H0 / H0e / H0m | 1:87 | Highly detailed forest edges and interior woodland | H0 narrow-gauge systems use the same scenery scale |
| 0 | approx. 1:45 | Fewer but more highly detailed trees | Trunk and branch structures become especially visible |
| 1 / G | large scales | Distinctive specimen trees and larger vegetation | Outdoor layouts require suitable materials |
Birches, beeches, poplars, fruit trees and mixed-forest trees.
Spruces, firs, pines, larches and complete forest sets.
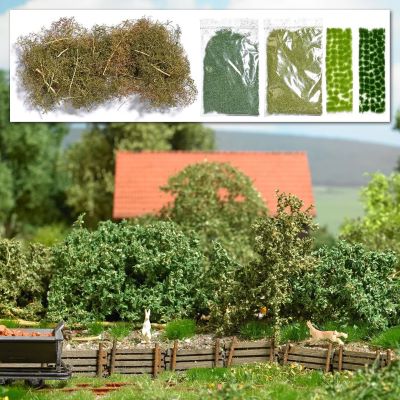
Undergrowth and natural transitions for forest edges.
Humus, earth, flock, foliage and ground textures.
Create clearings, forest edges and transitions into meadows.
Deer, stags, wild boars and other natural woodland scenes.
Secure trees, ground materials and foliage permanently.
Combine forests, terrain, rocks and neighbouring natural areas.
Select a manufacturer logo to open the corresponding English brand world with further trees, bushes and landscaping products.






The product finder loads suitable items from the current categories for deciduous trees, coniferous trees, bushes, forest floor and animals. Archived products and items explicitly marked as no longer offered are excluded. Stock and delivery information are not displayed on the product cards.
Matching forest products will be loaded …
Different tree sizes create a much more natural forest silhouette.
Loose groups and varying distances look more believable than regular rows.
Forest floor, earth and fallen leaves belong between the trunks of dense woodland.
Bushes, wild grass and smaller trees create a layered transition.
Small viewing gaps create interesting glimpses of trains and make the route appear longer.
A few animals on clearings or forest edges are more effective than an overcrowded scene.
Begin with a dark, earthy forest floor. Then add trees of different heights in loose groups. Bushes, young trees, undergrowth and individual clearings connect the trees into a coherent forest.
This depends on the size of the woodland area, scale and desired density. A fixed number is less important than achieving a visually continuous forest. Detailed individual trees can be used along the visible edge, with denser tree sets behind them.
Begin on the outside with grass, wild plants and bushes. Add smaller young trees next, followed by the tall forest trees farther inside. This creates a soft transition instead of a straight wall of trees.
Dark earth, forest-floor spreading material, leaf colours, small branches, grass tufts, flock and individual stones all work well. Not every area needs to be covered equally densely.
This depends on the region and landscape. Deciduous woodland suits many rural and temperate scenes, while spruce and fir forests are particularly suitable for uplands, mountains and forestry areas. Mixed forests combine both effects.
Do not alternate deciduous and coniferous trees in a strict sequence. Small groups of identical or similar species look more natural. Different heights and a layered forest edge strengthen the effect.
H0 offers a particularly wide selection of deciduous and coniferous trees. In addition to scale, consider the intended role: a forest-edge tree, large specimen tree and dense background woodland require different tree heights.
Yes. H0, H0e and H0m all use the same 1:87 scenery scale. The difference lies in the prototype railway track gauge, not the size of trees, buildings or figures.
Let the forest continue towards the layout background and place smaller trees farther back. Partly hidden railway lines and carefully positioned viewing gaps also increase the impression of spatial depth.
Deer, stags, wild boars, foxes and other forest animals work especially well on clearings and forest edges. The figures should match the chosen scale and be used sparingly.
Combine green with yellow, ochre, orange and reddish brown. Not every tree changes colour at the same time or to the same degree. The forest floor can also contain more brown fallen leaves.
Depending on the tree and base, plug mounting or a suitable model-making adhesive can be used. Test-position the trees before final fixing so that height, spacing and sight lines remain correct.
Discover further guides covering terrain, rocks, water, meadows, roads, gauges, track and layout planning in the central Modellbahnshop guide section.