Decoders and LEDs
Fine tips, short heating times and secure component holding are especially important around heat-sensitive electronics.

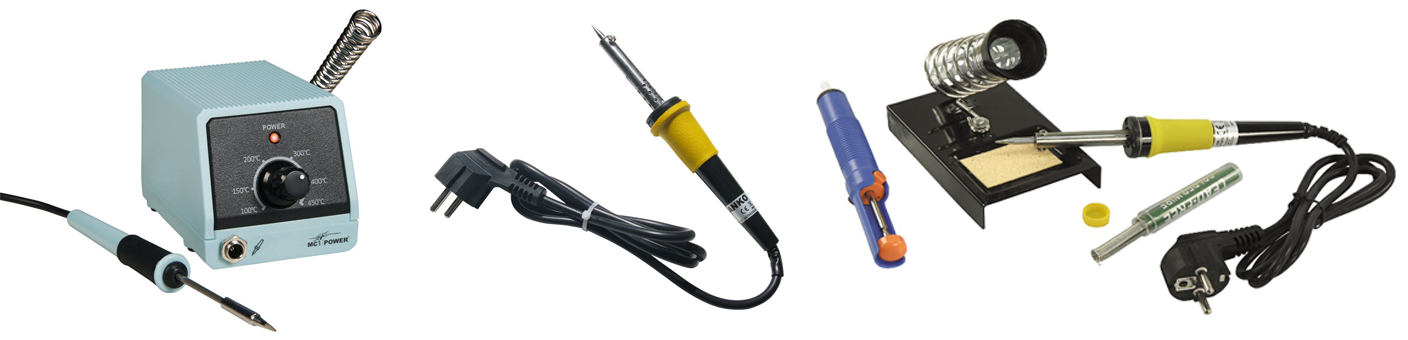
A soldering iron is one of the most important tools for model railway wiring, electronics and precision model making. This guide explains soldering irons, stations, temperatures, tips, solder, accessories, safe working and the most important buying criteria.
A soldering iron joins two metal surfaces by melting solder at the heated joint. The solder is a metal alloy, commonly based on tin with lead or a lead-free substitute, which forms a conductive, mechanically stable and durable connection after cooling.
A typical soldering iron consists of a handle, heating element and soldering tip. Depending on the device, the tip can be heated to approximately 200 to 450°C. The molten solder can then be applied to wires, circuit boards, track connections and small model-making components.
Soldering is particularly useful when a model railway requires reliable and compact electrical connections. Track feeds, turnout motors, signals, LEDs, interior lighting, feedback modules, loudspeakers and decoder wires can all be connected cleanly with the appropriate equipment.
Twisted wires can loosen, oxidise or develop contact problems. Adhesive does not normally provide an electrical connection. A correctly made solder joint combines electrical conductivity with mechanical stability.
Browse the complete tools and accessories range or explore Schönwitz electronics and workshop products .
Fine tips, short heating times and secure component holding are especially important around heat-sensitive electronics.
A compact iron or controlled station provides reliable connections for lighting, switches and power distribution.
Larger metal surfaces require sufficient heat transfer and a tip that is not too small.
A desoldering pump or braid removes excess solder and allows faulty joints to be rebuilt cleanly.
The recommended tool depends on the task, frequency of use, required mobility and your previous soldering experience.
Model makers can choose between standard electric irons, fine irons, temperature-controlled stations, USB tools, battery-powered tools, gas irons and complete starter sets.
| Tool Type | Typical Application | Advantages | Points to Consider |
|---|---|---|---|
| Fine soldering iron | Small wires, LED terminals, decoder wires and circuit boards | Compact, easy to handle and suitable for precise contacts | It may transfer too little heat to large rails or thick wires |
| Temperature-controlled soldering station | Regular electronics work, decoders, turnouts and repeated soldering tasks | Adjustable temperature, stable heat, stand and replaceable tips | Requires a workbench and mains supply |
| Standard electric soldering iron | Occasional wiring, connectors and straightforward repairs | Simple, affordable and quickly ready for basic work | Temperature may not be adjustable |
| USB soldering iron | Small mobile repairs and light wiring tasks | Compact, lightweight and fast to heat | Limited power reserve for large metal surfaces |
| Battery-powered soldering iron | Short repairs where no outlet is available | Cordless and easy to position in difficult locations | Operating time and power are limited |
| Gas soldering iron | Outdoor or remote work without an electrical supply | Highly mobile | Less precise temperature control makes it only partly suitable for delicate model railway electronics |
| Complete soldering set | Basic equipment for beginners and first projects | Iron, stand, solder and desoldering equipment in one package | Check the quality and replaceability of the individual parts |
Reliable soldered connections support power distribution, accessory control, lighting, vehicle conversions and the long-term maintenance of the layout.
Bus wires, additional track feeds, plugs and distribution points can be connected permanently and with little space.
Rails or rail joiners can be soldered where a secure feed or permanent electrical connection is required.
Fine wires from motors, contacts, relays and signals can be connected to the layout wiring.
LEDs, resistors, lamp wires and building-lighting circuits require small, insulated and mechanically stable joints.
Motor, lighting, speaker and function wires must be connected quickly and accurately without overheating the circuit board.
Loose wires, damaged plugs and small electronic components can be repaired cleanly when the correct tip and holding aid are used.
Fine model railway electronics usually benefit from compact soldering irons or stations in the low to medium power range. Thicker wires, rail profiles and larger metal surfaces may require more heat reserve so that the joint reaches working temperature quickly.
A temperature-controlled station allows the heat to be adapted to the solder, tip, wire size and component. The solder can flow quickly without exposing the surrounding material to unnecessary heat for a long period.
Many model-making and electronics tasks take place at approximately 300 to 380°C. A medium setting around 350°C can serve as a starting point for many electronics tasks before the temperature is adapted to the actual material and solder.
Lead-free solder usually requires a somewhat higher working temperature than leaded solder. The aim is not to keep the tip on the joint for as long as possible. A suitable temperature should allow the solder to wet the connection quickly.
Excessively long heating can damage decoder boards, LEDs, wire insulation, sleepers and nearby plastic parts. A temperature that is too low can also cause damage indirectly because the joint has to be heated for too long.
Good results depend not only on the soldering iron. Clean tips, appropriate solder, secure holding and a prepared work surface make model-making tasks considerably easier.
| Accessory | Purpose | Benefit in Model Making |
|---|---|---|
| Flux-core solder wire | Melts at the heated joint and forms the connection | Fine electrical joints for wires, LEDs and boards |
| Replaceable soldering tips | Transfer heat to contacts of different sizes | Fine tips for decoders and broader tips for rails or wires |
| Stand | Holds the hot iron safely when it is not being used | Protects the workbench and prevents accidental contact |
| Damp sponge or brass wool | Removes residue and oxidation from the tip | Maintains heat transfer and good solder flow |
| Third hand, clamps and magnifier | Holds wires, plugs or circuit boards securely | More control when both hands are required |
| Desoldering pump and braid | Remove excess or unwanted solder | Corrects mistakes on wires and circuit boards |
| Heat-shrink tubing | Insulates completed wire connections | Reduces the risk of short circuits |
| Side cutters, tweezers and wire strippers | Prepare and position small wires and components | Cleaner preparation and more accurate handling |
| Heat-resistant mat | Protects the work surface from heat and solder residue | Safer and more organised workbench |
Thin electronics solder with a flux core is generally used for model railway wiring and circuit boards. A diameter of approximately 0.5 to 1 mm is convenient for fine wires, decoder terminals, LEDs and small contacts.
Flux reduces oxidation and improves the flow of the molten solder. The solder should wet the wire and contact completely. A large lump of solder is not stronger and can create a short circuit.
Lead-free solder is widely used and generally needs a somewhat higher temperature and careful preparation. Good solder should flow evenly and cover the joint cleanly.
A fine pencil or needle tip is useful for decoder wires, SMD LEDs and boards. A broader chisel tip transfers more heat and is often more suitable for thick wires, plugs, brass parts and rail feeds.
The smallest available tip is not automatically the best. A tip that is too fine may transfer too little heat to a large contact and produce an unreliable joint.
Work in a controlled sequence. Practise first on spare wire or inexpensive components before soldering an expensive decoder or locomotive circuit board.
Prepare the stand, mat, lighting, ventilation, solder, tools and holding aid before switching on the iron.
Strip the correct length of insulation, twist the strands and avoid damaging the fine copper wires.
The wire, pad, plug or rail must be clean and free from heavy oxidation, dirt or old loose solder.
Apply a small amount of solder to the stripped wire and, where appropriate, to the prepared contact.
Touch the tip to the connection and feed solder to the heated joint rather than melting it only on the tip.
Remove the solder and iron, then keep the connection motionless until the solder has solidified.
The connection should appear clean, evenly wetted and mechanically secure rather than rough or irregular.
Use suitable heat-shrink tubing or insulation and check the electrical connection before installation.
Yes. Begin with straightforward tasks and inexpensive practice material before working on sensitive vehicle electronics.
Practise stripping, twisting and applying only a small amount of solder to copper wire.
Learn to hold the connector securely and create a joint without melting the surrounding plastic.
Practise short heating times and correct insulation on a simple low-cost lighting project.
A piece of stripboard or an old circuit board is suitable for learning how solder flows around a pad.
Use a desoldering pump or braid to remove excess solder and rebuild the connection.
Work on an expensive decoder or locomotive board only after completing several consistent practice joints.
A soldering iron becomes extremely hot. The workspace must be prepared so that the tool, solder and small parts can be handled without rushing or searching for missing equipment.
Place the hot iron only in a stable stand and never directly on the workbench.
Use a heat-resistant mat to catch solder residue and protect the surrounding work area.
Work in a well-ventilated area and avoid breathing fumes directly above the joint.
Keep paper, packaging, solvents, loose wires and unnecessary plastic parts away from the hot tip.
Arrange tools, lighting, solder and components before beginning so nothing has to be found while the iron is hot.
After use, check that the station, USB supply or battery tool is switched off or disconnected.
Select the equipment according to the intended work rather than price alone. An iron that is too weak becomes frustrating on larger joints, while a coarse tool is difficult to control around decoder terminals and LEDs.
The tool must heat the intended joint quickly without requiring prolonged contact.
Adjustable temperature is valuable for switching between fine electronics and larger wires.
Check whether fine and broader replacement tips remain available.
A short heat-up time is convenient for brief repairs and repeated workshop use.
A light, comfortable handle improves control during precise and prolonged work.
A stable holder should suit the iron and remain secure on the selected work surface.
Replacement tips, solder, cleaning material and holding aids should remain easy to obtain.
USB and battery tools are practical for short mobile work but do not replace a station for every task.
Decide whether the main task is wiring, electronics, rails, repairs or a mixture of all these areas.
The products cover temperature-controlled bench work, basic equipment, fine soldering and mobile repairs. Check the current availability and complete safety information on the individual product page.
Select a station for controlled regular work, a set for initial equipment or a compact iron for occasional and mobile repairs.
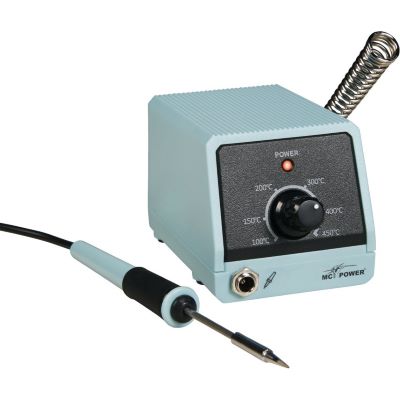
Compact entry-level station with continuously adjustable temperature, operating indicator, stand and soldering tip.
Open Product Details →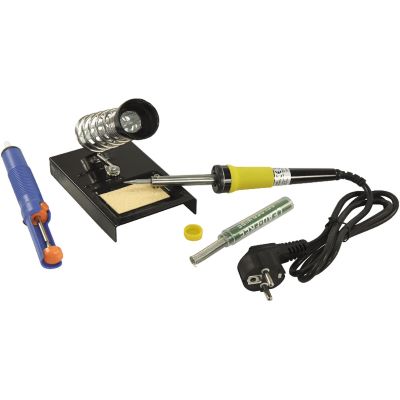
Entry-level package with soldering iron, stand, desoldering pump and solder in a dispenser.
Open Product Details →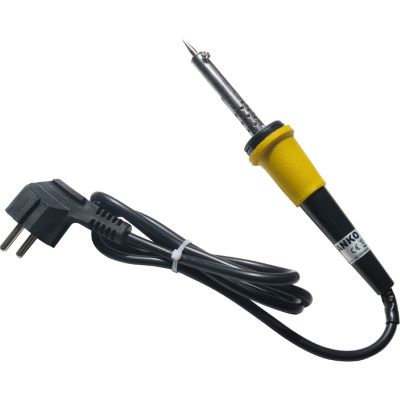
Compact fine soldering iron for general wiring, connectors and precise model-making tasks.
Open Product Details →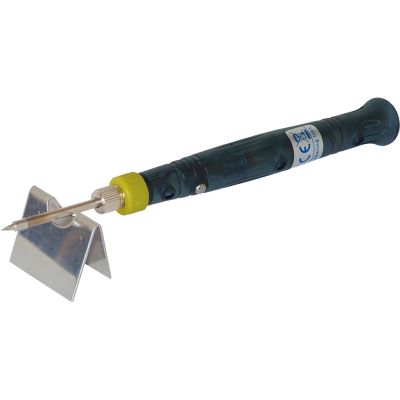
Lightweight USB iron with stand, protective cap and initial solder supply for small mobile tasks.
Open Product Details →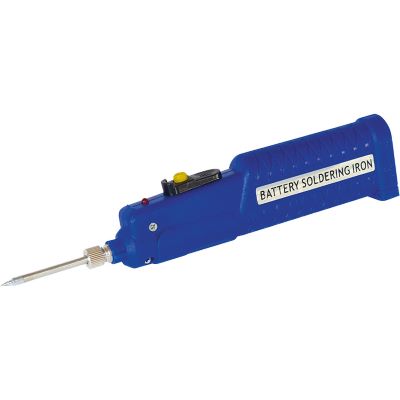
Mobile soldering iron for short work in locations without an immediately available electrical outlet.
Open Product Details →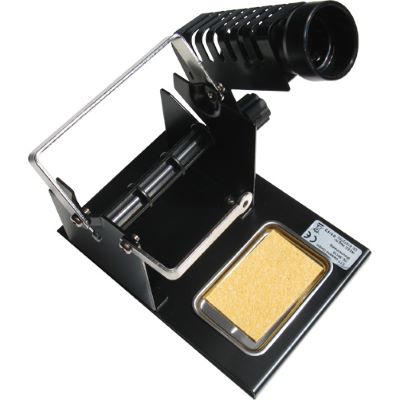
Combined stand and solder-wire dispenser for an organised workbench and safer placement of the hot iron.
Open Product Details →Fine solder, a clean tip and stable component positioning are essential for reliable wiring and electronics work.
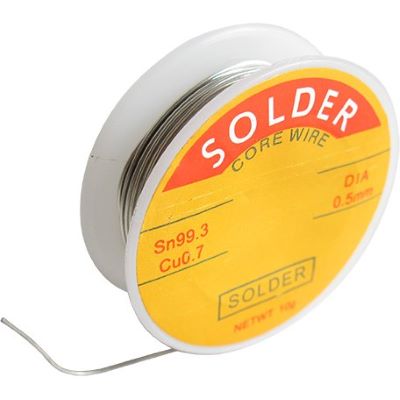
Thin solder wire for small wires, LED contacts, decoder work and fine circuit-board connections.
Open Product Details →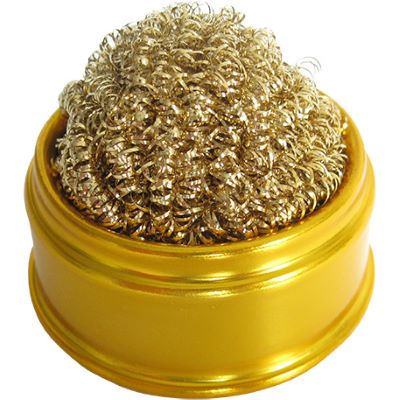
Metal cleaning sponge for removing residue and maintaining effective heat transfer at the soldering tip.
Open Product Details →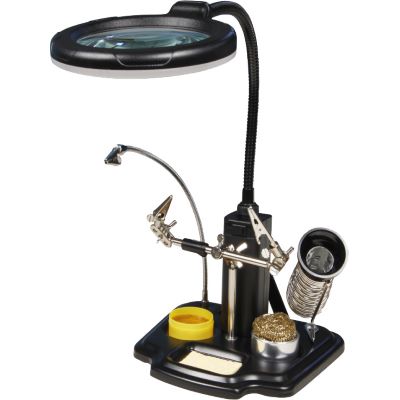
Illuminated magnifier, clamps, stand and cleaning equipment for precise work requiring both hands.
Open Product Details →It creates compact and reliable electrical connections for track feeds, turnout motors, signals, LEDs, decoders, loudspeakers and layout wiring.
A station is often better for regular work because it normally provides adjustable temperature, stable heat, a stand and replaceable tips. A simple iron can be sufficient for occasional wiring and repairs.
A medium setting around 350°C can be a starting point for many electronics tasks. The correct value depends on the solder, tip, wire size, component and heat dissipation.
Thin electronics solder with a flux core is practical. A diameter of approximately 0.5 to 1 mm is convenient for wires, LEDs, decoder contacts and circuit boards.
Flux helps reduce oxidation and improves how the solder flows and wets the prepared metal surfaces.
A fine pencil or needle-shaped tip is useful for small decoder wires and circuit-board pads. It must still transfer sufficient heat to the complete connection.
A broader chisel tip often transfers heat more efficiently to larger contacts, rails, plugs and thicker supply wires.
It is a poor connection where the solder has not flowed and wetted the joint correctly. It may look dull, rough or uneven and can later cause contact faults.
Yes. Begin by tinning spare wires, connecting simple plugs or soldering an inexpensive LED circuit. Practise before working on expensive decoders and locomotive boards.
Rails or rail joiners can be soldered where a secure power feed or permanent connection is required. Work quickly so that sleepers and nearby plastic parts are not damaged.
Remove residue regularly with a suitable damp sponge or brass cleaning wool. A clean, lightly tinned tip transfers heat more effectively.
Useful basic equipment includes a stand, solder, suitable tip, cleaning aid, side cutter, tweezers, holding aid, heat-resistant mat and a desoldering pump or braid.
No. It is practical for small mobile repairs and light wiring, but its limited power reserve may not be sufficient for large metal surfaces or extensive workshop work.
Use a desoldering pump or desoldering braid to remove excess solder. Clean and prepare the surfaces again before rebuilding the connection.
Select a soldering iron that matches the task, use appropriate accessories and practise on simple materials before working on sensitive model railway electronics.
Editorially reviewed and updated on 31 July 2026. The technical specifications, package contents, availability and safety information on the individual product page remain decisive.