Modellbahn Keks
Welcome!
Our cookies offer you a fast, relaxed and full-featured shopping experience. Some are necessary to operate the website and its functions. Others help us to improve our services. If you agree to this, simply consent to the use of cookies for preferences, statistics and marketing by clicking on "OK". Alternatively, you can deactivate individual cookies under "Customise cookies" or all cookies, except those required for the function of our website, under "Reject all".
Model railway river with rapids, rocks and realistic waterside scenery
Scenery Construction · Water · Riverbanks · Waterfalls

Designing Rivers and Streams on a Model Railway

From a narrow forest stream and a calm river to a dramatic mountain gorge: a carefully shaped riverbed, suitable base colours, transparent model water and naturally designed banks create convincing water scenery.

Include water scenery in the layout plan from the beginning

How do you create a believable river or stream?

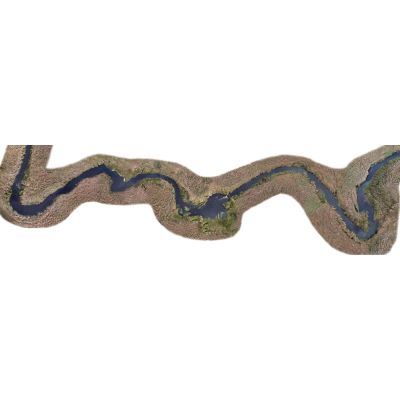
Designing rivers and streams on a model railway does not begin by pouring model water. First, the terrain must explain why the watercourse runs exactly where it does. A stream follows a depression, cuts between slopes or runs along the bottom of a valley. A larger river requires more space and often determines the position of railway lines, roads, bridges and buildings.

The watercourse should therefore be planned during the scenery construction stage. A natural stream rarely looks as though it was drawn with a ruler. Small changes in direction, varying widths, shallow inner bends and steeper outer banks create considerably more realism. The channel can narrow beneath a bridge, while a wider section or gravel bank may form beside a flat meadow.

The riverbed is equally important. Transparent model water derives much of its visual effect from the colours beneath it. A shallow stream reveals stones, sand and brownish or greenish areas. A river intended to look deeper can become gradually darker towards the centre. A uniformly bright blue surface often looks unconvincing for Central European rivers and streams. Water reflects the sky and its surroundings, but the visible colour is also strongly influenced by depth, the bed beneath it and the lighting.

The actual water surface should only be added after the riverbed, banks, stones and any bridge piers have been permanently installed, dried and sealed. Depending on the desired result, you can use ready-to-pour model water , two-component systems, heat-processed Water-Drops® or textured water foils. Transparent effect materials can then be added to create currents, waves, rapids and waterfalls.

Pour, shape or work with foil

Which model water is suitable for rivers and streams?

The right material primarily depends on whether the water should look calm or turbulent, shallow or visually deep. Product-specific mixing ratios, maximum layer thicknesses, working temperatures and drying times must always be taken from the respective manufacturer's instructions.

Ready-to-Pour 1-Component Model Water

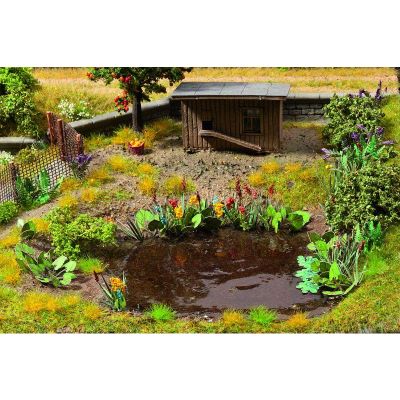
Particularly convenient for small ponds, shallow rivers and calm sections of streams. The transparent material leaves the prepared bed visible and is therefore well suited to waterbeds modelled with carefully graduated colours.

Two-Component Water

Resin and hardener are mixed before use. Depending on the product, these systems are particularly suitable for visually deeper water and larger casting projects. Always follow the exact mixing and processing instructions supplied by the manufacturer.

Water-Drops® and Similar Systems

Heat-processed materials can create clear water surfaces. NOCH Water-Drops® are melted before pouring and can subsequently be reheated and reworked after hardening. Because the material is processed hot, the manufacturer's safety instructions must be followed carefully.

Lake and Water Foil

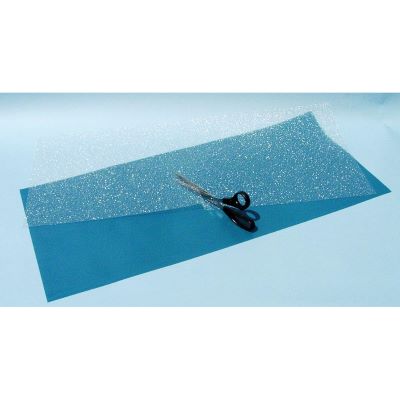
Foil does not require liquid casting. The prepared base provides the colour and visual depth, while the transparent textured surface creates reflections. This makes foil ideal for a fast and highly controllable water-scene construction method.

The key difference: water body and water surface

Casting materials create the visible body of water. Wave, spray and effect pastes are added afterwards to shape the surface. A calm river needs only a few subtle structures, whereas a steep mountain stream requires clearly visible current, foam and changes of direction.

Let the prototype determine the shape

Model streams, rivers and mountain water differently

Small Meadow or Forest Stream

A stream does not require much layout space. A narrow depression, a few stones, a darker bed and irregular vegetation along the banks are often sufficient. Small wooden footbridges or culverts can enhance the effect further.

Calm River in a Valley

A wider river benefits from visual calm. Large smooth areas, gravel banks, shallow banks and only occasional waves usually look more convincing than a surface that is heavily textured everywhere.

Mountain Torrent

Gradients, large rocks, narrow passages and changes in height create visible current. White spray should only appear where water strikes obstacles, drops vertically or becomes strongly turbulent.

A

Differentiate Inner and Outer Bends

River Shape

On a bend, the inside can be modelled flatter and more gravelly, while the outside bank can be steeper. This simple difference already prevents the watercourse from looking like a uniformly engineered channel.

Fine Detail

Do not distribute stones and driftwood evenly. Group them at believable collection points.

B

Vary the Width Deliberately

Perspective

Narrow sections beneath bridges or between rocks create movement. Wider sections beside meadows or gravel banks calm the scene. This produces a natural rhythm of faster and slower water.

Fine Detail

The entire watercourse does not need to remain visible. Vegetation and structures may hide individual sections.

The riverbank zone determines the realism

Combine stones, sand, soil and plants naturally beside the water

The transition from water to landscape is often more noticeable than the centre of the water surface itself. This is exactly where a layered approach to scenery construction is particularly worthwhile.

Gravel and Scree

Small stones work well in stream beds, gravel banks and shallow waterside areas. The grain size must suit the model scale. Larger rocks should be placed selectively as individual obstacles.

Sand and Soil

Fine sand creates shallow banks and soft transitions. Brown, grey and ochre tones can be mixed together. Avoid a hard, uniformly coloured strip following the entire edge of the water.

Reeds and Waterside Plants

Reeds, water lilies and moisture-loving vegetation are especially effective in calm waterside zones. They should grow in irregular groups rather than forming a continuous fence along the river.

Grasses and Bushes

Different fibre lengths and shades of green connect the water with the surrounding scenery. On steep rocky banks, a larger proportion of the mineral surface should remain visible.

Roots and Driftwood

Small branches collected around inner bends, rocks or bridge piers suggest flooding and flowing water. A few deliberately positioned pieces look more convincing than evenly distributed wood.

Rocks Beside the Stream

Damp waterside rocks can appear darker than dry rock faces. Add moss, small plants and rounded stones and connect the scene visually with the guide to designing model railway rocks .

From the terrain depression to the finished water surface

Build a model railway river or stream in eight steps

This sequence separates terrain shaping, sealing, colouring, the water body and final detailing. Errors can therefore still be corrected before transparent water material is permanently added.

1

Mark the Watercourse

Planning

Mark the stream or river on the unfinished terrain. Take bridges, roads, railway lines and buildings into account at the same time.

Check

View the route from the normal operating position and check whether it disappears naturally into the scenery.

2

Shape the Riverbed and Banks

Structural Construction

Use rigid foam, filling compound or terrain material to create a shallow depression. Avoid side walls that remain the same height along the entire route.

Check

Deliberately distinguish between inner bends, shallow gravel areas and steeper bank sections.

3

Seal the Base Completely

Preparation

Close joints, cracks and open layout edges. Liquid water products must not be able to escape unnoticed into the layout structure.

Check

Allow the material to dry completely and check compatibility with the selected water system.

4

Colour the Waterbed

Visual Depth

Make shallow areas lighter and deeper zones darker. Brown, olive, grey and muted green often create a more natural result than a uniformly blue surface.

Check

Test the colour transition beneath a small transparent sample before completing the full watercourse.

5

Install Stones and Fixed Details

Riverbed

Secure gravel, rocks, bridge piers and selected branches before pouring the water. Loose parts may otherwise float or change position.

Check

Only install materials that are compatible with the selected water product.

6

Apply the Model Water

Water Body

Mix, heat or pour the selected product exactly as specified in its instructions. Maximum layer thickness, temperature and drying time differ between systems.

Check

Before completing a large river, produce a small test piece using exactly the same base materials.

7

Add Current and Waves

Surface

Shape transparent effect material in the direction of flow. Waves occur particularly around stones, narrow passages, bridge piers and strong changes in direction.

Check

Deliberately leave calm areas smooth so that different levels of water movement remain believable.

8

Add Vegetation and Scenic Details

Finishing

Only after the water has completely cured should reeds, grasses, bushes, figures, animals, footbridges and further scenery details be added.

Check

Leave some areas of the bank open instead of filling every centimetre with accessories.

Use movement selectively

Create realistic waterfalls, rapids and spray

A waterfall is a strong scenic focal point and works particularly well in combination with mountains , ravines and rocks . The stream should visibly arrive above the waterfall and continue logically below it. An isolated transparent strip on a rock face can otherwise look decorative rather than naturally integrated into the landscape.

Transparent or milky-transparent viscous water-effect materials can be shaped into currents, waves and waterfalls. Some products are white when first applied and become transparent or translucent as they dry. White highlights for spray should only be added sparingly where the water actually strikes rocks, the pool below or other obstacles.

A small stream often needs only a few short rapids. Always align the surface texture with the direction of flow. Repeated waves running across the stream at the same height look more like a regular pattern than moving water. A combination of smooth sections, small eddies and individual areas of stronger turbulence is much more convincing.

Many water materials are scale-independent

Design rivers and streams for H0, TT, N, Z, 0, 1 and G

Many model water products, paints and basic terrain materials are suitable for several scales. Visible stones, plants, bridges, footbridges and other scenery details must nevertheless match the chosen model scale.

Gauge Scale Typical Water-Scene Effect Pay Particular Attention To
Z 1:220 Long river courses and very fine streams Choose extremely fine gravel and waterside plants
N / Nm 1:160 Large valleys and bridges in comparatively little space Keep water textures fine and restrained
TT / TTe / TTm 1:120 Good balance between expansive scenery and visible detail Combine universal products with correctly scaled plants
H0 / H0e / H0m / H0f 1:87 Highly detailed banks, bridges and water scenes H0 narrow-gauge systems use the same scenery scale
0 / 0e / 0m approx. 1:45 Large stones, detailed banks and visible water texture Model surfaces and plants with strong three-dimensional detail
1 1:32 Generous individual scenes with strong visual detail Calculate the material requirement for larger water areas beforehand
G / IIm / II often approx. 1:22.5 Large streams and garden railway landscapes Use weather- and temperature-resistant materials outdoors
Manufacturer worlds directly at Modellbahnshop

Manufacturers for Model Water and Water Scenery

The manufacturer pages provide access to further water products, scenery materials, waterside plants, rocks and matching accessories.

Load current webshop products automatically

Search Products for Rivers, Streams, Riverbanks and Bridges

When this section approaches the viewport, suitable products are loaded from current Modellbahnshop categories. Filter by manufacturer, gauge and intended use. Archived products and products explicitly marked as no longer offered are excluded. Stock and delivery status are deliberately not displayed on the product cards.

Products will be checked when this section approaches the viewport …

Identify problems before the water is poured

Avoid Common Problems with Model Railway Rivers and Streams

The River Is the Same Width Everywhere

Vary the width, bank shape and direction. Narrow passages, shallow gravel banks and small wider sections create a much more natural appearance.

The Water Is Bright Blue

Work more with brown, grey, olive and muted green or blue tones. The centre of a deeper section can gradually become darker.

Every Centimetre Has Waves

Moving water is generally localised. Rocks, bridge piers and narrow sections create current, while other areas can remain almost completely smooth.

The Riverbed Is Not Watertight

Liquid model water reliably finds even small openings. Seal and test joints and layout edges carefully before pouring.

Waterside Plants Form a Straight Row

Place reeds, grasses and bushes in irregular groups. Deliberately leave gravel areas and open soil visible between them.

The Bridge Is Added Afterwards

Abutments and bridge piers should be in their final positions before the water is poured. This allows the terrain transitions around the structure to be finished cleanly.

Frequently asked questions about water scenery

Answers About Model Water, Riverbeds, Banks and Currents

How do you build a stream on a model railway?

First create an irregular stream bed in the terrain. Seal it completely and add the base colour, stones and bank materials. Apply the selected model water only after the base is fully dry. Waves, plants and final details are added afterwards.

What colour should a model railway river be?

A natural river does not have to be blue. Brown, olive, grey and muted green tones often look more convincing. Shallow bank areas can remain lighter, while deeper areas can gradually become darker.

Which is better: model water or water foil?

Casting material creates a three-dimensional water body and can be adapted very individually to the scene. Water foil is faster and cleaner to install and does not require liquid casting. Both methods can produce realistic results.

How can I prevent model water from leaking?

The entire waterbed must be completely sealed before pouring. Check joints, openings, layout edges and transitions especially carefully. A small test piece is recommended when using unfamiliar materials.

How do you create current in a model stream?

Shape wave or effect material in the direction of flow. The texture should be strongest around stones, narrow sections, bridge piers and small changes in height, while calmer sections remain smoother.

How do you build a model waterfall?

First build the rock formation with a logical stream above and below it. Transparent or translucent effect material then forms the falling water. Add spray sparingly around the area where the water strikes the rocks or pool below.

Which plants are suitable beside a model railway stream?

Reeds, water lilies, low grasses, bushes and moisture-loving waterside vegetation are particularly suitable. Arrange the plants in irregular groups according to the terrain rather than distributing them evenly along the complete bank.

Which stones are suitable for a stream bed?

The grain size must match the model scale. Fine gravel creates the bed, while larger individual rocks form obstacles and influence the visible current. A mixture of sizes generally looks more natural than identical stones.

Can model water be used for all model railway scales?

Many model water products are scale-independent and can be used for Z, N, TT, H0, 0, 1 or G. The elements that must match the model scale are primarily stones, plants, bridges, figures and other visible details.

When should a bridge over the river be installed?

The bridge, abutments and any piers should ideally be fitted before the final water layer is added. This allows the riverbed and banks to connect cleanly to the structure.

How can a model river look visually deeper?

Make the waterbed progressively darker from the banks towards the centre. Transparent water materials allow this colour transition to remain visible and create an impression of depth without requiring a physically deep casting.

What must be dry before model water is poured?

The terrain shell, filling compounds, paints, adhesives and installed scenery materials should be completely cured in accordance with their respective product instructions. Residual moisture or incompatible materials can affect the finished water surface.

From a Stream to a Complete Model Railway Landscape

Discover further guides covering mountains, rocks, roads, vegetation, tunnels, layout planning, gauges, track and technology in the central Modellbahnshop knowledge section.

Open the Model Railway Guide