

Forest Lake
A dark lake bed, irregular shoreline, trees and very few man-made details create a calm and natural atmosphere.


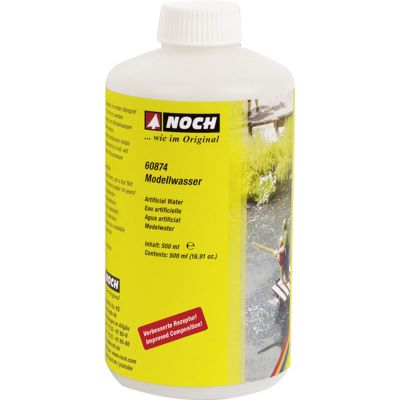
Calm lakes, small ponds, village ponds and harbour basins create visual depth and reflect the surrounding landscape, buildings and light. The key elements are the prepared base, water colour, shoreline shape and a surface texture that suits the type of water being modelled.
Designing lakes and water surfaces on a model railway does not begin with blue paint or transparent resin. The convincing effect is already created by the shape of the water, the lake bed and the surrounding scenery. A forest lake requires different colours and banks from a recreational lake, village pond or technical harbour basin.
Plan the water surface together with the model railway scenery . A natural body of water rarely has an evenly shaped shoreline. Shallow bays, small headlands, reed beds, rocks and occasional gravel areas break up the outline and prevent the lake from looking like a simple hole cut into the layout.
The lake bed is especially important. Transparent model water allows the colours underneath to remain visible. Shallow areas can appear light, sandy or earthy. Towards the visually deeper centre, the colours gradually become darker. This creates convincing depth even when the actual water layer is only a few millimetres thick.
A dark lake bed, irregular shoreline, trees and very few man-made details create a calm and natural atmosphere.
A small water surface with reeds, grass, a jetty or a few ducks works particularly well between a village and agricultural scenery.
Shallow banks, leisure figures, boats and paths create a visibly busier summer scene.
Steeper banks, rocks, a dam and railway or road bridges create a distinctive mountain scene.
Quay walls, jetties, boats and technical equipment replace natural shorelines and create clean, functional edges.
Transparent model water is particularly suitable for calm lakes and ponds. The prepared base remains visible and provides most of the visual depth.
Heat-processed systems become liquid before application and, depending on the product, allow transparent or coloured water surfaces to be created. Always follow the manufacturer's temperature and safety instructions.
Two components are combined before pouring. Depending on the specific product, this technique can be used for highly transparent and individually coloured water surfaces.
Foils and textured plates do not require liquid casting. They can be cut to shape and are especially useful when a fast, controlled water surface is required.
Adhesives, paints, foams, casting materials and effect pastes can react differently when combined. If you are using an unfamiliar combination, create a small test piece first and follow the manufacturer's instructions for mixing ratio, temperature, layer thickness and drying time.
A convincing model lake often does not require a physically deep layer of water. A carefully graduated lake bed is much more important.
Sandy beige, grey or brown tones suggest shallow areas. Small stones and individual plants can remain visible through the water surface here.
Muted green, brown, blue-green or anthracite creates the impression of deeper water. Blend colour transitions softly and avoid hard rings.
Large smooth areas reflect light and surroundings more strongly. Calm water surfaces therefore often look more realistic when waves are not modelled everywhere.
Blue can be appropriate depending on the prototype. Central European ponds and lakes, however, often look more natural with muted and broken colours.
A small island, peninsula or reed bed interrupts large open water surfaces and creates a foreground, middle ground and background.
A lake can appear to continue beyond the rear of the layout. Vegetation, terrain or a bridge can disguise the actual edge.
The shoreline connects the water with the surrounding landscape. A uniformly green edge quickly looks artificial. Alternate between soil, fine gravel and natural materials , grass, individual rocks and open areas.
reeds, water lilies and waterside plants work especially well in calm, shallow bays. Arrange them in groups rather than surrounding the whole lake with a continuous line of vegetation.
Steep shorelines can be created with rocks or a slope . Harbour and urban areas, on the other hand, are better suited to walls, jetties and clearly defined technical edges.
Mark the lake size, bays, islands, access routes, jetties and neighbouring structures first.
The lake should complement the landscape and railway route rather than look like an empty area that was filled afterwards.
Create shallow shorelines and a slightly deeper centre. Avoid uniformly vertical edges wherever possible.
Carefully seal joints and open layout edges before applying any liquid water material.
Begin with lighter colours at the edge and blend them softly into darker tones towards the visually deeper centre.
Secure stones, rocks, posts or other visible elements firmly and allow them to dry completely.
Pour the selected model water or cut lake foil cleanly to shape. Follow the individual product instructions exactly.
Add a few waves or wind structures if required. Deliberately preserve large calm areas.
Add reeds, grass, bushes, jetties, boats and figures only after all wet work has been completed.
| Gauge | Scale | Typical Strength | Pay Particular Attention To |
|---|---|---|---|
| Z | 1:220 | Strong water-scene effect in a small area | Use extremely fine plants, stones and boats |
| N / Nm | 1:160 | Lakes and long shorelines with low space requirements | Keep wave textures subtle |
| TT | 1:120 | Good balance between surface area and detail | Select accessories according to scale |
| H0 / H0e / H0m / H0f | 1:87 | Very wide selection of plants, boats and structures | All H0 variants use the same scenery scale |
| 0 / 0e | approx. 1:45 | Strong detail around the shoreline | Plan the material quantity for larger water surfaces beforehand |
| 1 | 1:32 | Large individual scenes with clearly visible surface details | Use sufficiently large plants and shoreline structures |
| G / IIm | often approx. 1:22.5 | Generous garden railway water scenes | Use only materials suitable for outdoor operation |
Casting water, lake foils, water effects and other materials for realistic water scenes.
Reeds, water lilies, jetties and delicate waterside details.
Water plates, walls and materials for harbour and shoreline edges.
Materials for shallow shorelines, beaches and lake beds.
Grass fibres and tufts for natural transitions into the surrounding terrain.
Railway and road bridges as distinctive focal points above water surfaces.
Shape and seal lake beds, slopes and terrain transitions.
Combine water, terrain, rocks, plants and other essential scenery materials.
Select a manufacturer logo to open the corresponding English brand world at Modellbahnshop.





The product finder loads matching webshop products when this section approaches the viewport. It includes water products, foils, plants, shoreline materials, bridges and scenery accessories. Archived products and items explicitly marked as no longer offered are excluded. Delivery and stock status are not displayed on the cards.
Matching water products will be loaded …
Muted brown, green and grey tones combined with soft colour transitions usually create considerably more visual depth.
Alternate bays, gravel, reeds, rocks and exposed soil rather than designing the entire shoreline identically.
Lakes often have large calm areas. Increase surface texture only where wind or movement makes sense.
Before using liquid model water, completely seal all joints, edges and transitions and allow them to dry.
A jetty, beach, harbour or waterside access should explain how boats and figures reach the lake.
Keep the surroundings clean during longer drying periods and protect the water surface in accordance with the product instructions.
First shape the lake and lake bed. Then seal the base, create the colour gradient and secure fixed details. Afterwards, apply model water or install lake foil. Waterside plants and scenic details are added last.
This depends on the prototype. Shallow areas can appear beige, brown or greenish, while deeper zones become progressively darker. A uniformly bright blue surface is only convincing for certain scenes.
A soft colour gradient on the lake bed is the key. Light shoreline areas gradually become darker towards the centre. Transparent water keeps this transition visible and creates the impression of greater depth.
Lake foil is quick, controllable and does not require liquid casting. Liquid model water provides greater freedom for individual shapes and creates a visible transparent water body. The best method depends on the project.
There is no universal value. Permitted layer thickness, shrinkage and drying time vary between products. Always follow the instructions supplied with the selected water system.
Transparent model water obtains much of its colour and visual depth from the prepared lake bed beneath it. Even a shallow water layer can therefore appear considerably deeper.
A pond can be smaller, more irregular and more heavily vegetated. Reeds, water plants, darker shoreline areas, grass and individual stones work particularly well.
Keep large areas as smooth as possible and add surface texture only sparingly. Calm water reflects light, plants and buildings more strongly and supports the impression of a windless lake.
Reeds, water lilies, low grasses and bushes are suitable for many lakes and ponds. Arrange the vegetation in groups while keeping some shoreline areas deliberately open.
Water scenery can be created in Z, N, TT, H0, H0e, H0m, Gauge 0, Gauge 1 and G. Many water materials are universal, but plants, boats and structures must match the respective scale.
Yes. It looks particularly convincing when terrain, vegetation, the background or a structure partly conceals the actual edge and creates the impression that the lake continues beyond the layout.
A single sailing boat, kayak, jetty or small group of figures may already be enough. Open water is important so that the lake continues to read as a landscape feature rather than an accessory area.
Discover further guides covering terrain, mountains, rocks, roads, track, gauges, digital technology and layout planning in the central Modellbahnshop guide section.