
The quick answer before construction begins
Build Your First Model Railway Layout Step by Step
What do you need for your first model railway layout?
Reliable train operation requires less equipment than a fully designed layout might suggest. Begin with a clearly defined area, a coordinated technical system and a simple track plan.
Operate trains first, build permanently afterwards
A locomotive, suitable coaches or wagons, a closed or otherwise usable section of track, a power supply and a controller are sufficient for the first run. A starter kit combines these components into one coordinated introduction.
Building the first layout step by step means basing every decision on the previous one. The available area determines the gauge. The gauge leads to a track system. The track and control system then determine which powered vehicles can be used.
An oval with one turnout, a siding and a small station already provides continuous running, shunting and stabling. Complicated hidden stations, helixes and automation can follow later. Every section of track must first remain accessible and operate reliably.
Personal project overview
Document construction progress in eight stages
Mark completed phases. Your progress is stored only in this browser and can be reset at any time.
Your first layout
Every completed phase increases the progress indicator by 12.5 per cent.
The complete route to the first operating day
Eight construction phases for a reliable model railway layout
This sequence helps prevent unsuitable purchases and construction errors that are difficult to correct. Every phase ends with a result that can be checked.
Step 01 · Room planning
Define the space and secure access
Measure the length, width and accessible depth. Doors, windows, furniture, radiators, sloping ceilings and operating aisles belong in the drawing. Deep layouts require access from several sides or removable sections.
A scale room drawing showing the free construction area, operating aisles and planned storage space.
Step 02 · Model size
Select a gauge that suits the available area
H0 provides a large selection, TT saves space and N allows longer trains. Z suits very compact projects. Gauge 0 and G show large details but require wider track and larger radii.
A defined model size that suits visual comfort, handling, intended train length and layout format.
Step 03 · Technical foundation
Define the electrical and control system
Analogue control suits straightforward operation with one train. Digital control permits several independently controlled locomotives and additional functions. In H0, two-rail and centre-conductor systems must also be distinguished.
A clear written record of the gauge, track system, conductor type, control system and supported digital protocol.
Step 04 · First purchase
Select a starter kit or individual components
A starter kit reduces compatibility questions and enables train operation quickly. Individual components are useful when the train, command station and track system have already been selected precisely. Always compare the complete contents and required base area.
An operational basic system containing a train, track, connection, power supply and controller.
Step 05 · Route design
Test the track plan, radii and usable lengths
Begin with a station, turnout and siding. The longest train determines platform and usable track length. Wherever possible, use larger visible curves than the technical minimum radius.
A loosely assembled track plan that every intended vehicle can negotiate slowly, quickly, pulled and pushed.
Step 06 · Baseboard and electrics
Build the substructure and provide reliable power
The base must be level and resistant to twisting. Longer routes require several power feeds. Route and label cables clearly. Hidden track must remain accessible at all times.
A stable baseboard with documented wiring and fault-free test operation in both directions.
Step 07 · Miniature world
Add scenery only after the test runs
Fix and ballast the track only after extended testing. Begin with one small area: station, road, buildings, terrain and vegetation. One finished section provides more motivation than many unfinished construction sites.
One completely designed, accessible and technically operational section of the layout.
Step 08 · Vehicle operation
Select vehicles and create operating tasks
Begin by adding coaches or wagons that suit the existing locomotive and selected theme. Check the radius, coupling, conductor system and digital protocol. A second locomotive is particularly useful when additional running or shunting tasks exist.
A manageable vehicle fleet with passenger, freight or shunting tasks instead of an unstructured collection.
From a miniature railway to a garden railway
Which gauge suits the first layout?
Scale, model track gauge and space requirements must be considered together. Uncommon model sizes are possible but usually provide fewer immediately available system components.
| Model size and variants | Typical scale | Standard-gauge model track | Suitable first project | Important consideration |
|---|---|---|---|---|
| Z and Zm | 1:220 | 6.5 mm | Small tabletop, shelf or scenery layout. | Clean track, good lighting and careful handling. |
| N, Nm, Ne and Nf | 1:160 | 9 mm | Compact main line with longer trains. | A rerailer and reliable current collection. |
| TT, TTm, TTe and TTf | 1:120 | 12 mm | Branch line or station on a medium-sized area. | Check the vehicle and track selection for the intended theme. |
| H0, H0m, H0e and H0f | 1:87 | 16.5 mm | Oval with a station, turnout and siding. | Distinguish two-rail, centre conductor and narrow gauge. |
| 00 | Approximately 1:76 | Usually 16.5 mm | Compact British branch or shunting railway. | Check the prototype, couplings and electrical system. |
| S, Sm, Se and Sf | 1:64 | 22.5 mm | Specialist or collector layout with short trains. | Comparatively limited system selection in Europe. |
| 0, 0m, 0e and 0f | Usually 1:45 | 32 mm | Shelf, segment or shunting layout. | Large vehicles, large radii and a stable substructure. |
| 1, 1m, 1e and 1f | 1:32 | 45 mm | Running route or module in a large room. | Vehicle weight, electrical output and storage area. |
| II, IIm/G, IIe and IIf | 1:22.5 | 64 mm; IIm usually 45 mm | Robust circuit indoors or in a garden. | Weather, drainage and safe outdoor wiring. |
| III, V, VII, X and special sizes | Depends on the system | Large and specialist dimensions | Garden, park or specialist railway. | High requirements for area, technology and safety. |
Purchase components in a sensible order
What is required immediately and what can follow later?
Purchase only those components required for the next operational construction stage. This keeps both the technical system and budget manageable.
| Component | When required | Recommendation | Why is it important? |
|---|---|---|---|
| Starter kit or basic equipment | Immediately | Coordinate the train, track, control system and power supply. | Enables the first complete test operation. |
| Rerailer and cleaning equipment | Immediately | Use care products intended for the selected gauge. | Clean wheels and track prevent many contact problems. |
| Turnout and siding | First extension | Extend only within the same track system. | Creates shunting tasks and greater operating value. |
| Baseboard and cables | After testing the track plan | Build a stable structure and document all power feeds. | Supports permanently level and reliable operation. |
| Buildings and scenery | After the test runs | Begin with the station and a small surrounding area. | Keeps the technical system accessible during testing. |
| Additional locomotives | After expanding the layout | Buy only vehicles that suit the radius, system and operating task. | Prevents purchasing vehicles without a useful application. |
Prevent problems before permanent construction
Six common mistakes on a first model railway layout
Many difficulties arise because construction, gluing or purchasing begins too early. Check these points before starting each new phase.
Beginning with a project that is too large
A small operational layout provides more useful experience than a permanent construction site that is difficult to reach.
Confusing electrical systems
The same gauge does not automatically mean compatible current collection, wheelsets or digital protocols.
Using radii that are too tight
Long coaches and large locomotives often require wider curves than the short vehicles supplied with a starter kit.
Fixing track immediately
Only extensive test runs reveal poor transitions, reverse curves and problematic turnout combinations.
Making hidden areas inaccessible
Tunnels and hidden routes require openings for cleaning, maintenance and derailed vehicles.
Spending the entire budget on vehicles
Track, power supplies, the baseboard, tools and maintenance products are as important as additional locomotives.
Coordinated products for beginning the project
Starter kits, track extensions and layout substructures
These examples represent different gauges and system routes. Compare the required base area, conductor type, control system and complete contents on the individual product page.
Starter kits for the first train operation
A complete package is the simplest route to a technically coordinated test circuit and can later be extended within the same system.
 PIKO 57113 H0 analogue freight train starter set
H0 · Two-rail · Analogue
PIKO 57113 Freight Train
A steam locomotive, three wagons, roadbed track and a speed controller provide a classic introduction.
Open Product Details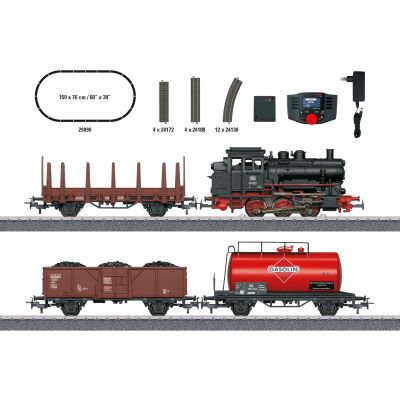 Märklin 29890 H0 digital freight train starter set
H0 · Centre conductor · Digital
Märklin 29890 Freight Train
C Track, a Mobile Station, an mfx locomotive and three different freight wagons form a coordinated digital introduction.
Open Product Details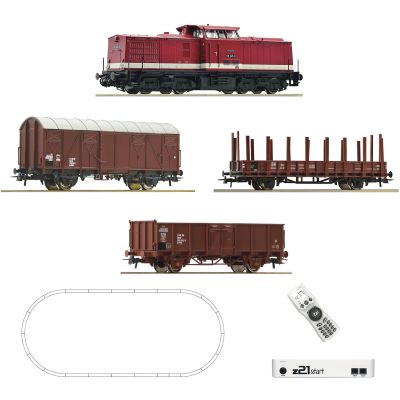 Roco 5110009 H0 digital DR freight train starter
set
Roco 5110009 H0 digital DR freight train starter
set
H0 · Two-rail · DCC
Roco 5110009 DR Freight Train
A digital freight train, z21 start, handheld controller and Roco Line roadbed track provide a modern two-rail introduction.
Open Product Details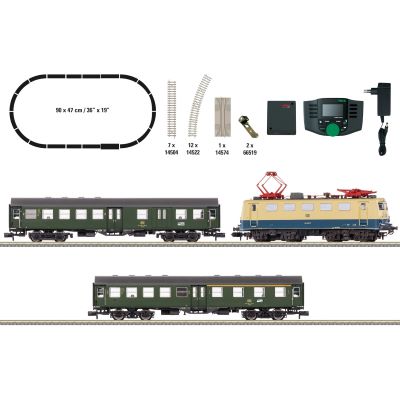 Minitrix 11132 N digital passenger train starter
set
Minitrix 11132 N digital passenger train starter
set
N Gauge · Digital · Sound
Minitrix 11132 Passenger Train
A compact digital passenger train with a Mobile Station permits longer routes within a small base area.
Open Product Details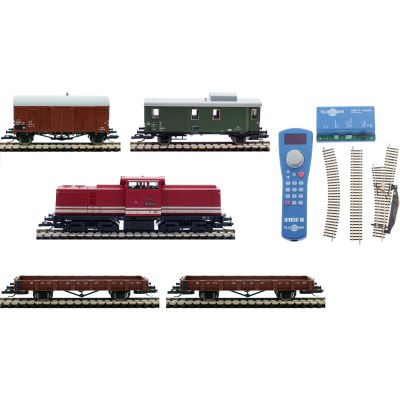 Tillig 01208 TT digital freight train starter set
TT Gauge · Digital · DR
Tillig 01208 Freight Train
A TT freight train with a track oval, turnout and siding provides an initial opportunity for shunting.
Open Product Details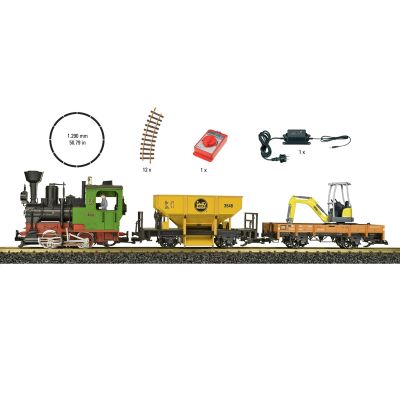 LGB 70403 G Gauge freight train starter set
G Gauge · Analogue · Large scale
LGB 70403 Freight Train
A large steam locomotive, two wagons, track circle and controller provide an introduction for indoor or garden operation.
Open Product DetailsTrack extensions and a prepared substructure
Turnouts create operating tasks, while a planned trackbed construction kit simplifies the transition from a test circuit to a permanent layout.
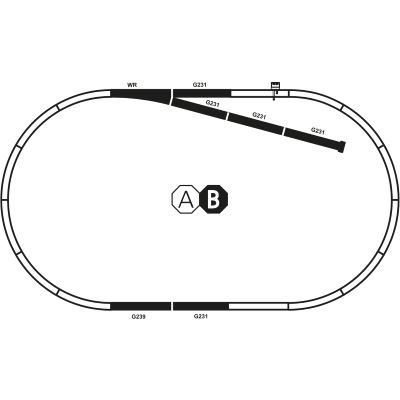 PIKO 55310 H0 A-Track Set B
H0 · Track extension
PIKO 55310 A-Track Set B
A turnout, straight track sections and a buffer stop create the first siding or shunting track.
Open Product Details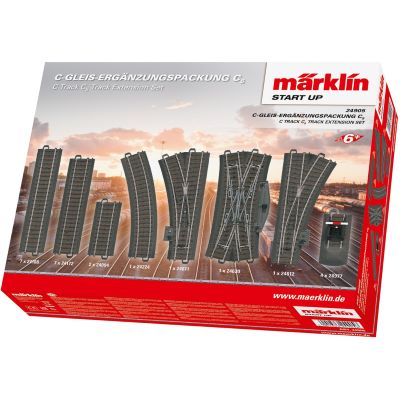 Märklin 24905 H0 C Track C5 extension set
H0 · Centre-conductor track
Märklin 24905 C Track C5
Turnouts, a crossing turnout, straight track and buffer stops create additional operating locations.
Open Product Details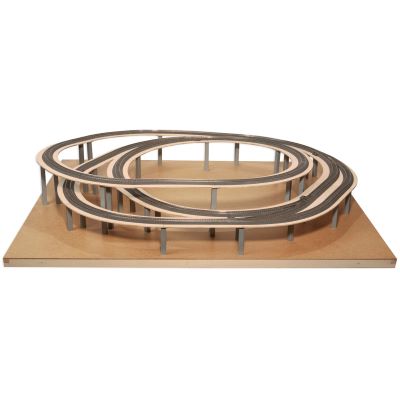 NOCH 53615 Easy-Track Theisensee
H0 · Layout substructure
NOCH 53615 Theisensee
A pre-planned trackbed with a branch and siding provides the foundation for a compact permanent H0 layout.
Open Product DetailsStarter Kits
Compare coordinated complete packages by gauge.
Track and Turnouts
Extend the selected track system deliberately.
Track Sets
Build circuits, stations and structured extensions.
Track Planning
Prepare radii and the required track components.
Digital Command Stations
Select a controller by protocol and expansion target.
Layout Design
Build terrain, roads, vegetation and water.
Figures and Scenes
Add believable life to the station and scenery.
Cleaning and Care
Preserve reliable current collection and operation.
Brand worlds for operation and scenery
Manufacturers for the first model railway layout
Products from different brands can be combined when the gauge, electrical system, wheelsets, couplings and digital technology are compatible.








Answers before and during layout construction
Frequently asked questions about a first model railway layout
These answers explain space requirements, system selection, track construction, power feeds and scenery.
How do I build my first model railway layout step by step?
Define the available space and gauge first. Then select the electrical system, basic equipment, track plan, baseboard, test operation, scenery and a suitable vehicle fleet.
Which gauge is suitable for a first layout?
H0 provides a large selection, TT saves space and N permits longer routes. The available room, handling and intended train length remain decisive.
How large should a first model railway layout be?
It should remain completely accessible and be possible to finish in manageable stages. A small station with a siding already provides varied operation.
Should the first model railway be analogue or digital?
Analogue control is straightforward for one train. Digital control is suitable for several locomotives, lighting, sound and later expansion of the layout control system.
Is a starter kit sufficient for a small layout?
Yes, for the first train operation. A turnout, siding, cleaning equipment and a suitable construction surface are useful next additions.
When may the track be fixed and ballasted?
Only after extended test runs with every intended vehicle type. Turnouts, transitions and tight curves must operate reliably beforehand.
How many power feeds are required?
This depends on the track length and system. Longer routes benefit from several power feeds. Connections should be documented and installed in accordance with the manufacturer's instructions.
Can vehicles from different manufacturers operate together?
Frequently, yes. The gauge, conductor type, wheelsets, coupling, minimum radius and, for digital vehicles, at least one shared protocol must match.
Which scenery should be completed first?
Begin with the station, platform, road and one small terrain section. Hidden or difficult-to-reach areas should be closed only after reliable operation has been established.
What should be added after completing the basic layout?
Useful additions include further operating locations, suitable coaches or wagons and lighting. Additional locomotives or more extensive digital control should follow afterwards.
Continue developing the first layout step by step
Develop your first model railway layout into a long-term project
Explore gauges, track systems, digital technology, layout planning, scenery, vehicles, maintenance and operation in greater detail on the central English model railway guide page.
Go to the Model Railway GuideContent reviewed and updated: 30 July 2026. The technical specifications, safety information and assembly instructions for each individual product remain authoritative.